

Raise your hand if you love carbs. Now raise both hands if you are a sucker for homemade bread!! Homemade bread is the bomb, and every time I make it (or someone makes it for me), I ask myself why I don’t make bread more often. It really isn’t very hard – it just requires patience. Ohhh, now I get it. It’s that patient part that I frequently lack. After my mom recently brought over a loaf of homemade Dutch Oven Artisan Bread, I vowed to make more bread from scratch.

My mom was super kind to share her recipe for artisan bread with me – hence, to all of you. We devoured this bread. I don’t think it lasted more than two days in our house, and the kids were gone one of those days.

Keith and I sliced it up, lightly toasted it and lathered it in butter. No margarine here folks. Only good old fashioned butter when it comes to a delicious homemade bread. The Artisan Bread is so flavorful on it’s own, that you really could opt to eat it as is, use it for sandwiches, or you can toast it and serve with jam. Either way, it won’t last long.

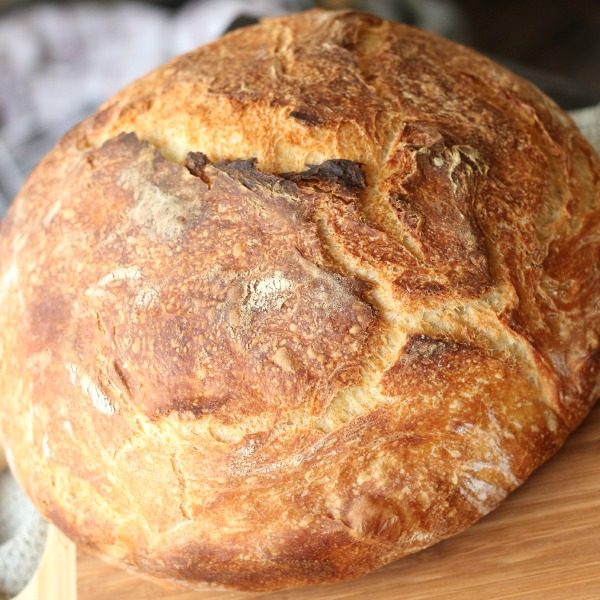
Not only does homemade bread taste wonderful, it is so pretty to look at. I just kept it out on the bread board, and remained in awe over it’s beauty. You don’t have to be a professional baker to create truly amazing breads that would wow a crowd. I seriously think I am going to start making this Dutch Oven Artisan Bread and gifting it to friends, family, teachers, the mail man, the pizza delivery boy, etc. Perhaps I will gift it with a jar of homemade plum jam. What a nice gift that would make, don’t ya think?
Okay, have at it. I’d love to know how you like to enjoy your freshly baked bread!
Dutch Oven Artisan Bread
Ingredients
Method
- Combine all dry ingredients in a medium bowl, including yeast. Add warm water and stir by hand for 30 seconds to 1 minute.
- Lightly coat the inside of another medium bowl with olive oil and place the dough in the bowl. Cover the bowl with plastic wrap and let the dough rest 12 hours at room temperature. Can do this overnight.
- Remove the dough from the bowl. Fold in half, and then fold it again. Let it rest for 15 minutes in the bowl.
- Generously flour a piece of parchment paper, and set the dough on top. Shape into a ball. This can be done by tucking the sides underneath the ball of dough.This is just done for looks.
- Place seam side down onto the paper. Cover loosely with oiled plastic wrap and let rise 1-2 hours at room temperature, until more than doubled in size. I place mine by a warm window.
- After 1 hour of final dough rising, preheat oven to 450°F. Place the pot in the oven at least 30 minutes prior to baking, to preheat.
- When dough has more than doubled, remove the pot from the oven place the dough inside, with the seam side now up. Cover with the lid and bake 30 minutes. Remove the lid and bake 15-25 more minutes, until the loaf is nicely browned.
Danielle Royalegacy says
Questions! Is there a preference to what kind of pot to use? What do you mean by pot “seam”?
Emily Lyon says
Use an enameled dutch oven Danielle. When I refer to the seam, I just mean that when you have shaped the dough into a ball, by folding the sides underneath the ball, it creates a seam.
megan says
Do you have a recommended dutch oven?